
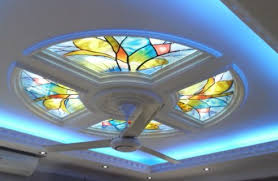

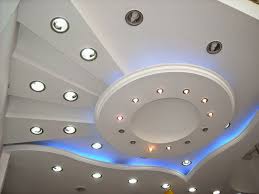
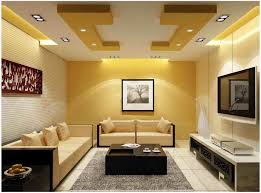

GYPSUM CEILING CONTRACTORS IN DUBAI SHARJAH AJMAN AND UAE.
AL MUZALAAT BUILDING MAINTENANCE LLC.
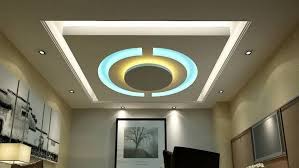
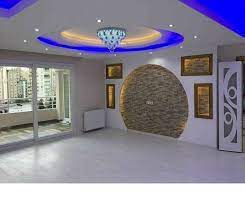
Gypsum Ceiling Boards Installation Process
gypsum ceiling installation
Gypsum Ceiling Installation for commercial and residential facilities in Kenya. Ever wondered how gypsum ceiling is installed? Installing a perfect gypsum designer ceiling system is not an easy task if compared to other ceiling systems like PVC ceiling, wooden T and G or soft boards. It requires careful planning in terms of measurements, needed tools, the correct materials and most important marking ceiling levels correctly.
Thinking of installing a gypsum ceiling for your house or business premise anywhere in Kenya? Well, you don’t need to do it yourself or hire an armature then end up with a bad job at an expense. We sale internationally certified gypsum boards and related accessories and refer experienced installers. Gypsum Ceiling supplies offers free consultation. You can visit our office and talk to our experts. Our team of independent certified
Essential Tools Required to install a Gypsum Ceiling System
There are several options for suspending or installing a gypsum ceiling either on concrete slab or roof. Some of the systems includes; The V-keel style system, the Hat furring channel system and the standard channel/stud system. We will discuss about the standard channel/stud type of installation which is cheaper in terms of materials and labor. Below are essential tools required to install a standard gypsum ceiling; either plain or design; Note that Gypsum Ceiling Supplies Ltd Sales all the mention drywall ceiling metal profiles and other related accessories
Tools Required
Tape Measure – A 12 feet tape measure will let you measure longer walls. It also helps measure and cut gypsum board panels in sizes
Level Machine (Recommended: Borsch GRL 300 HV Professional) – Take accurate levels for a strong, durable gypsum ceiling system
Hammer – Used to drive steel nails on concrete surface
Chalk line Marker – A chalk line or chalk box is a tool for marking long, straight lines on relatively flat surfaces, much farther than is practical by hand or with a straightedge
Drilling Machine for fastening (Borsch Cordless is Durable)– It is an easier to use tool for fastening screws to metal framing
T Square – A T-square is a technical drawing instrument used by draftsmen primarily as a guide for drawing horizontal lines on gypsum boards
Utility Knife – Used to cut gypsum board to required sizes
Dust Mask – Protect your respiratory system from drywall dust and impurities
Gypsum Plaster Pan – Easy to carry smaller amount of joint filler while skimming
Trowel – For applying and smoothing plaster on gypsum ceiling joints
Paint Brush – For painting unreachable surfaces and small spaces
Paint Roller – For painting large surfaces quickly
Paddle mixer – It is optional because you can still use a piece of wood to mix the joint filler.
Bucket – Used to mix joint filler
Tin snip – Used to cut metal profiles such as studs and channels to required length
Putty Knife – Used to apply joint filler in small holes and corners
You can get all the tools mentioned above at Gypsum Ceiling Supplies shop located at Ruai Bypass at the
Gypsum Ceiling Installation: Materials Required
This is a list of the most preferred materials required to install a long-lasting gypsum ceiling system with a strong framing and can withstand any type of environment
Gyproc Gypsum boards 9mm
Gyproc Gypsum Board Moisture Resistant 9mm for (Bathroom and Kitchen
Gypsum Channels/tracks/Rails
Gypsum Studs
Wall Angles
Drywall Screws 1Inch or 1.5
Self-Drilling Screws 13mm
Gypsum Fiber tape
Gyproc gypsum filler 25Kg
Sandpaper grit P80
Paint Brush
Paint Roller
Undercoat Paint
Vinyl matt Paint
Steel nails 1 Inch or 1.5Inch
Gypsum Ceiling Installation Process: Step by Step
Step 1: Measurements
Take room measurements using a tape measure or a lesser measuring machine to determine the dimensions. Once you have the dimensions convert them into square meters and divide by the surface area of a standard gypsum board which is 2.88 square meters. I recommend a 9mm Gyproc gypsum board 8ft*4ft*9mm. Make sure you add some few sheets for wastage
Step 2: Levels
Using the lesser level machine or horse pipe, take the levels of the ceiling and mark long straight lines. Fix gypsum channels immediately below the ceiling joists where the wall screed ends. Using the already drawn lines as a guide, use steel nails to fix the perimeter channels.
Level Lesser Machine 1GRL 300 HV PRO LESSER
Level Lesser Machine 2BORSCH GRL 300 HV PRO
Level Lesser Machine 3GRL 300 HV PRO KIT
Gypsum Ceiling Installation using the LESSER LEVEL MACHINE
Step 3: Metal Framing
Install two layers of metal studs, the first layer should run from channel to channel to create a 600mm centers between studs. The second layer should run on top of the first layer as a support structure. Make sure you interconnect the stud frame with gypsum screws. Support the stud framing on the roof rafters with studs. If the roof is high, consider installing steel tubes in the roof to be used as the support members for the ceiling structure
If you are installing gypsum ceiling on a slab, use 2- or 3-inch screws with pcs of gypsum wall angles to secure the stud framing on the slab. Alternatively, use roll bolts with steel tubes if the slab is weak. Anchor support studs to the steel tubes using self drilling screws at 600mm gaps
Step 5: Fixing Gypsum Boards
Once you are done with the studs, fix the 9mm gypsum boards starting from the middle of the room on the stud framing while staggering the joints. The utility knife will help you cut the gypsum boards to sizes where applicable. You can now tape the joints with joint tape if you were considering a flat gypsum ceiling system. Continue with step 6 for a gypsum designer ceiling
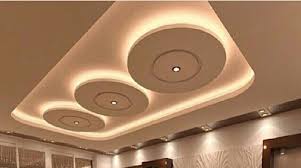
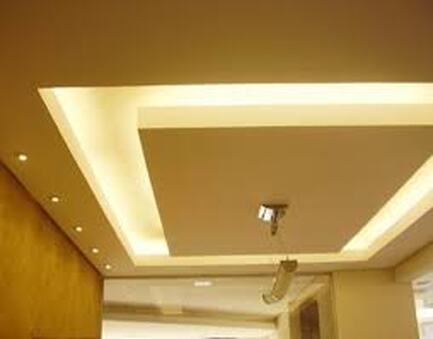
Step 6: Bulk Heads
On the flat ceiling you have already installed, draw (with your pencil) the geometrical shape you want to design by hand or by an already cut plywood as a guide. Fix channels or drywall angle along the guidelines of your shape and making sure your design structure is fixed firmly on the structural studs through the gypsum boards.
Step 7: Cutting Provisions for Fixtures
Cut provisions for lights, ceiling access doors and other fixtures at this stage
Step 7: Install Architectural Moldings
Install decorative moldings such as fiber cornices (fine, smooth and flexible) or gypsum cornices (Made from Plaster of Paris Powder) along the edge between the walls and the ceiling (Optional). Other architectural moldings include; medallions, corner trough and much more
Step 8: Finishing
Tape all joints with a special self-adhesive tape called gypsum fiber tape. Then apply 2 coats of joint filler preferably Gyproc gypsum filler in the taped joints. You can also decide to skim the entire gypsum ceiling.
Step 9: Painting
Sand down the joints with smooth sandpaper preferably grit P80 and make sure all bumps and imperfections are eliminated. Apply two coats of undercoat paint, it can be Crown covermatt or Super fast paint from Duracoat. You can apply the final coat of vinyl matt paint or any other decorations such as wallpaper, murals or textured paints.
At Gypsum Ceiling Supplies, we offer professional gypsum ceiling system installation. Our team creates lasting solutions and don’t cut corners.
Gypsum Ceiling Boards Installation Process
gypsum ceiling installation
Gypsum Ceiling Installation for commercial and residential facilities in Kenya. Ever wondered how gypsum ceiling is installed? Installing a perfect gypsum designer ceiling system is not an easy task if compared to other ceiling systems like PVC ceiling, wooden T and G or soft boards. It requires careful planning in terms of measurements, needed tools, the correct materials and most important marking ceiling levels correctly.
Thinking of installing a gypsum ceiling for your house or business premise anywhere in Kenya? Well, you don’t need to do it yourself or hire an armature then end up with a bad job at an expense. We sale internationally certified gypsum boards and related accessories and refer experienced installers. Gypsum Ceiling supplies offers free consultation. You can visit our office and talk to our experts. Our team of independent certified
Essential Tools Required to install a Gypsum Ceiling System
There are several options for suspending or installing a gypsum ceiling either on concrete slab or roof. Some of the systems includes; The V-keel style system, the Hat furring channel system and the standard channel/stud system. We will discuss about the standard channel/stud type of installation which is cheaper in terms of materials and labor. Below are essential tools required to install a standard gypsum ceiling; either plain or design; Note that Gypsum Ceiling Supplies Ltd Sales all the mention drywall ceiling metal profiles and other related accessories
Tools Required
Tape Measure – A 12 feet tape measure will let you measure longer walls. It also helps measure and cut gypsum board panels in sizes
Level Machine (Recommended: Borsch GRL 300 HV Professional) – Take accurate levels for a strong, durable gypsum ceiling system
Hammer – Used to drive steel nails on concrete surface
Chalk line Marker – A chalk line or chalk box is a tool for marking long, straight lines on relatively flat surfaces, much farther than is practical by hand or with a straightedge
Drilling Machine for fastening (Borsch Cordless is Durable)– It is an easier to use tool for fastening screws to metal framing
T Square – A T-square is a technical drawing instrument used by draftsmen primarily as a guide for drawing horizontal lines on gypsum boards
Utility Knife – Used to cut gypsum board to required sizes
Dust Mask – Protect your respiratory system from drywall dust and impurities
Gypsum Plaster Pan – Easy to carry smaller amount of joint filler while skimming
Trowel – For applying and smoothing plaster on gypsum ceiling joints
Paint Brush – For painting unreachable surfaces and small spaces
Paint Roller – For painting large surfaces quickly
Paddle mixer – It is optional because you can still use a piece of wood to mix the joint filler.
Bucket – Used to mix joint filler
Tin snip – Used to cut metal profiles such as studs and channels to required length
Putty Knife – Used to apply joint filler in small holes and corners
You can get all the tools mentioned above at Gypsum Ceiling Supplies shop located at Ruai Bypass at the
Gypsum Ceiling Installation: Materials Required
This is a list of the most preferred materials required to install a long-lasting gypsum ceiling system with a strong framing and can withstand any type of environment
Gyproc Gypsum boards 9mm
Gyproc Gypsum Board Moisture Resistant 9mm for (Bathroom and Kitchen
Gypsum Channels/tracks/Rails
Gypsum Studs
Wall Angles
Drywall Screws 1Inch or 1.5
Self-Drilling Screws 13mm
Gypsum Fiber tape
Gyproc gypsum filler 25Kg
Sandpaper grit P80
Paint Brush
Paint Roller
Undercoat Paint
Vinyl matt Paint
Steel nails 1 Inch or 1.5Inch
Gypsum Ceiling Installation Process: Step by Step
Step 1: Measurements
Take room measurements using a tape measure or a lesser measuring machine to determine the dimensions. Once you have the dimensions convert them into square meters and divide by the surface area of a standard gypsum board which is 2.88 square meters. I recommend a 9mm Gyproc gypsum board 8ft*4ft*9mm. Make sure you add some few sheets for wastage
Step 2: Levels
Using the lesser level machine or horse pipe, take the levels of the ceiling and mark long straight lines. Fix gypsum channels immediately below the ceiling joists where the wall screed ends. Using the already drawn lines as a guide, use steel nails to fix the perimeter channels.
Level Lesser Machine 1GRL 300 HV PRO LESSER
Level Lesser Machine 2BORSCH GRL 300 HV PRO
Level Lesser Machine 3GRL 300 HV PRO KIT
Gypsum Ceiling Installation using the LESSER LEVEL MACHINE
Step 3: Metal Framing
Install two layers of metal studs, the first layer should run from channel to channel to create a 600mm centers between studs. The second layer should run on top of the first layer as a support structure. Make sure you interconnect the stud frame with gypsum screws. Support the stud framing on the roof rafters with studs. If the roof is high, consider installing steel tubes in the roof to be used as the support members for the ceiling structure
If you are installing gypsum ceiling on a slab, use 2- or 3-inch screws with pcs of gypsum wall angles to secure the stud framing on the slab. Alternatively, use roll bolts with steel tubes if the slab is weak. Anchor support studs to the steel tubes using self drilling screws at 600mm gaps
Step 5: Fixing Gypsum Boards
Once you are done with the studs, fix the 9mm gypsum boards starting from the middle of the room on the stud framing while staggering the joints. The utility knife will help you cut the gypsum boards to sizes where applicable. You can now tape the joints with joint tape if you were considering a flat gypsum ceiling system. Continue with step 6 for a gypsum designer ceiling
Step 6: Bulk Heads
On the flat ceiling you have already installed, draw (with your pencil) the geometrical shape you want to design by hand or by an already cut plywood as a guide. Fix channels or drywall angle along the guidelines of your shape and making sure your design structure is fixed firmly on the structural studs through the gypsum boards.
Step 7: Cutting Provisions for Fixtures
Cut provisions for lights, ceiling access doors and other fixtures at this stage
Step 7: Install Architectural Moldings
Install decorative moldings such as fiber cornices (fine, smooth and flexible) or gypsum cornices (Made from Plaster of Paris Powder) along the edge between the walls and the ceiling (Optional). Other architectural moldings include; medallions, corner trough and much more
Step 8: Finishing
Tape all joints with a special self-adhesive tape called gypsum fiber tape. Then apply 2 coats of joint filler preferably Gyproc gypsum filler in the taped joints. You can also decide to skim the entire gypsum ceiling.
Step 9: Painting
Sand down the joints with smooth sandpaper preferably grit P80 and make sure all bumps and imperfections are eliminated. Apply two coats of undercoat paint, it can be Crown covermatt or Super fast paint from Duracoat. You can apply the final coat of vinyl matt paint or any other decorations such as wallpaper, murals or textured paints.
At Gypsum Ceiling Supplies, we offer professional gypsum ceiling system installation. Our team creates lasting solutions and don’t cut corners.
AL MUZALAAT BUILDING MAINTENANCE LLC
AL JURF AJMAN UAE.
CONTACT US 0565019033 / 0565019034
E-MAIL [email protected]
AL JURF AJMAN UAE.
CONTACT US 0565019033 / 0565019034
E-MAIL [email protected]
